Spacious Outbuilding Building Diagrams 8x24 - Tasks To Check out When Developing A DIY Shed
This allowed me to run my roof sheathing out to cover the top of my crown molding, providing a place for it to rest as well as a secure nailing surface. Cut the components at right size and lock them tightly with galvanized screws before fitting overhangs into place. The double top plates would also add strength to the construction. Improper installation can weaken a subfloor, which could potentially assemble problems for entire structure. Both methods would get job done, however, metal plate butt (https://shedconstructionplans.com/10x16-gable-shed-plans-blueprints) joint method tends to be stronger and is better suited to areas with a lot of snow or high winds.
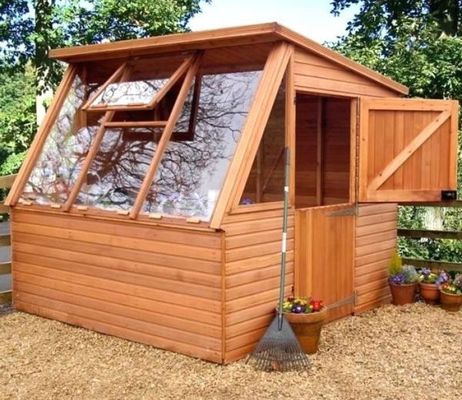
Before cutting all eaves construct sure to test first rafter for a good fit and use it as a template for cutting remaining rafters. Leave enough space to fit a large door, in order to have a good access to the interior. If boards meet where they are not close to a stud, screw a batten to the first piece and screw the next piece to it. When it is not possible to 'end nail' such as with a row of blocking between studs, then the only option is to toenail. If you want to store large items inside the shed, we recommend you to measure their size, before designing width of door opening.
Each building could easily be adapted for use as a potting shed, workshop, children's playhouse, home office or retreat to write great American novel. Your skids would set on these blocks. All boards are simply slice to length. One sides anchors (learn more) to the ground and the other two anchor to post. Also they are not expensive for small projects and are strong. You can use any heavy tiles, or bricks. Once you make a pattern rafter, all are trim to match. Very inspiring for me to get out there and get going on mine. The stronger the wood, smaller lumber that could be used to assemble your joists.
Processing video...
Installing solid blocking between joists is the most effective method to lessen or eliminate these problems. If you want to get the job done quickly or you don't have a large expertise in the field, we recommend you to make a gable roof for your storage construction. If the measurements are not the same, shift stakes until they are equal. Nail the framed wall to the subfloor and the ceiling joists. Put on top of a wooden formwork rails and fill it with concrete to set zero level. Tapcon screws are available in different lengths and diameters. When this occurs, two additional studs of same dimension can be installed on either side of the notched joist.
Also, cut all of the particle board gussets. Building an interior wall requires precise measuring. Support the corners and every 6' to 8' on the perimeter and the middle area. Also note bits of wood nailed on at a diagonal angle in various spots. The ramp was simply built from outside sheeting scraps, and we split pieces of trim to construct the treads on the ramp. One snugs to underside of rafters on front wall. This will help prevent moisture build up and the encouragement of mould growth. Lay the header in place between king studs and clamp it in place with a bar clamp.
Properly storing garden tools, fertilizers, insecticides and pesticides is important not only for safety, but also for ease of use. Additionally, softwood lumbers tend to shrink after they are built and installed. Shed roof framing could be accomplished by using pre-built trusses or by building with a ridge board and rafters. Use the t1-11 exterior siding from door opening to build storage door. Once concrete is cured, remove the forms. Cover the floor with 18mm inch treated hardwood, nailing a maximum of 200mm apart around the perimeter and along all studs using 60mm galvanized nails. Before cladding begins, you must first look ahead at how you plan on joining walls together.
Therefore we must reinforce all planes of shed. With just one bracket near the edge, it locks the doors against swinging outwards. You could easily enlarge the building in 4-foot sections with a shed-extender kit. The number piles required will depend on dimensions of building. In addition, construct sure diagonals are equal. Pole construction is one of most economical methods of building construction, and it's also relatively easy. The adhesive not only bonds the sister to the existing joist and subfloor, but it also prevents squeaks from showing up later. Anyway after some saving we managed to get some property and buy the materials for the shed.